Stage 6-1
.jpg)
.jpg)
.jpg)
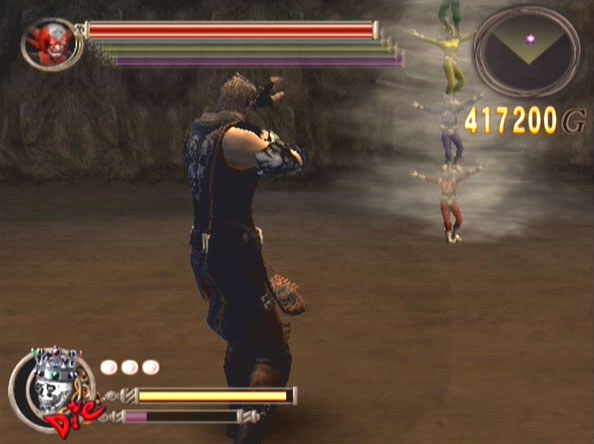
Jump off the ledge and you’ll see 2 regular thugs to the left in the distance. If they’re not on LV Die, you can easily face kick them off the edge. (This is what’s so great about this stage) Otherwise, you can taunt over the one closer to you and deal with them separately.
When they’re down, 2 ladies (in purple) will appear from the other side of the bridge. As always, you can face kick them off the edge or deal with them the usual way. After them, cross the bridge and you’ll see a zebra-striped lady and regular lady. You can try taunt the zebra-striped over but if they both come over, quickly kill the regular lady first, then refill TP using zebra-striped. Once you’ve grabbed your reward, go back past the bridge and jump down to your left.
.jpg)
.jpg)
.jpg)
.jpg)
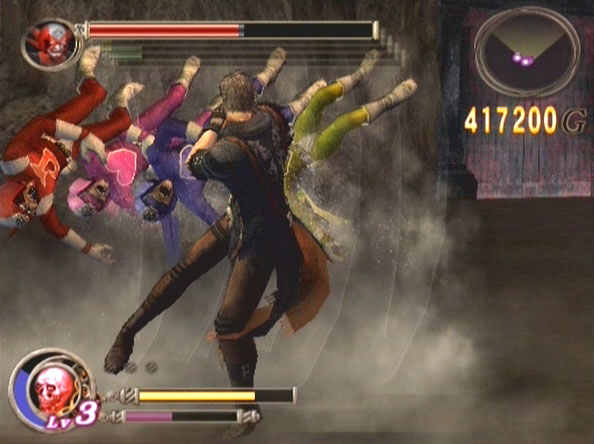
Here you’ll face 1 regular thug, 1 clawed midget, 1 regular thug again, 1 lady, 1 elite thug and your first Sensei (samurai dude) in that order. You face them one by one, so it shouldn’t be too overwhelming. Try not to unleash godhand until the last two, if necessary.
Against Sensei, stay close to him at all times (punch-able distance). He is 99% likely to do a sword trust the moment battle begins so prepare to duck. Most of his attacks are high attacks but he does have a few low/mid attacks so beware. The best way to deal with him is to keep punching and anticipate when he’ll guard. If you didn’t manage to break his guard in time, your best bet is to immediately duck. He randomizes between high and low/mid attacks so you’ll have to be alert in the case you have to back flip instead.
When he does high attacks, you can easily counter him in between (if he swings a few times) with a Left Jab (Left Jabs are best/most reliable for countering). Of course, this works best when you’ve memorized/gotten used to his attacks, so first timers, try your best! If he starts owning you, you can unleash godhand, but if possible, I suggest not (unless you’re confident you can refill your TP back before he dies).
.jpg)
.jpg)
.jpg)
Open the silver chest at the far end for a free technique (Stomping Fist) and proceed towards the door. A villager behind the door will tell you he smells some creeps coming… and so here’s your next battle. Depending on your enemy level, there may be 4~6 enemies (all regular thugs + 1 zebra-striped lady). Notice that the area you’re in has open edges, which means the easiest way to deal with this is to launch them off and away, and that’s what the katana you have in hand is for.
Once the enemies come, immediately and carefully run past them to the intersection near the silver chest. This is easier said than done, but press /\ when an enemy’s close enough (but not too close) and that should launch him off the edge. Repeat this carefully until all/most of them are knocked off. If you get hit and drop the katana, run away and lure them towards you before you run back to pick up the katana. This entire process may be very annoying, especially if your enemy level is high. (LV Die easily takes the piss if you even make one mistake)
There’re 2 more ways you can achieve the same thing. One, Typhoon Kick. Two, unleash godhand and spam your fastest launch technique. These 2 ways are easier but I’d save the TP and orbs if possible.
Anyway, soon enough 4 more enemies (2 regular thugs + 1 elite thug + 1 lady) will join you. By then you are likely to have lost your katana, so you can either run towards the door and pull out the fire stands and repeat the same thing with the katana or throw the explosive cans at them. If you get cornered and are in grave danger, unleash godhand and use the method above.
Stage 6-2
.jpg)
.jpg)
.jpg)
The villager right next to you will reward you with either a strawberry or banana. Run to the end and look to your left to see a metal pole that you can pull out. Enter the opening and where you see the villager, immediately turn to your left and start whacking the bar at the thug hiding there until he dies (you can throw the bar at him at the end). Once he’s down, quickly pick up the wooden plank he dropped and turn 180 degrees around to see a whip-lady. Whack or throw the wooden plank for an easy win.
Then, continue up the path and you’ll see 2 thugs waiting at the end, one with a sledgehammer. Carefully taunt the sledgehammer one over and deal with him the usual way. Make sure to refill as much TP as possible. Do the same with the other thug. When you’re done, pick up the sledgehammer and jump off the ladder at the end to greet your very first 2 Mohawk (or axe) ladies.
The Mohawk ladies may be a pain in the ass for first timers, but good news is, 90% of their attacks are high attacks, so ducking almost never fails, almost. =P (be careful of their jump attacks, as with most ladies).
At the bottom of the ladder, throw the sledgehammer at one of them and she should come over on her own (taunt is likely to bring them both over). She’s generally easy when alone; just break as many guards as possible and duck + counter when she attacks. If she’s still giving you trouble, you can unleash godhand or spam Drunken Twist-cancels.
When she’s down, taunt the other one over and deal with her the same way, only, make sure to refill enough TP for one unleash (spam Yes Man Kablaam when she’s dizzy). When done, pick up the key dropped and pull out the metal pole where there’re 3 villagers. This part is optional but if you have at least one unleash ready for use, it’s a piece of cake. =)
.jpg)
.jpg)
.jpg)
.jpg)
Throw away the metal pole you have at hand at a wall (save it for later) and go past the bars. 1 lady and 2 regular thugs will appear to join you. It’s a really tight little area and there’re 3 villagers right by your ass, so unleashing godhand is really the only way to take them out easily and quickly without hurting yourself or the villagers. Beware though, there’s always the possibility of a demon, and if it appears, get out of that area immediately and fight the demon outside.
When you’re done, grab your reward, pick up the metal pole from before and jump back up the ladder. Here you’ll be introduced to a new enemy – Tiger Joe. Tiger Joe is one of the only 4 enemies in the game who’re capable of duck-evasion, hence making it hard to land your attacks, but no worries. If he’s cheap, we can simply be cheaper than him =P
So, quickly approach him and from a good distance press /\ (with the metal pole in the hand) to launch him. You can do this 3 times before throwing it at him for maximum weapon abuse. Then, simply spam Drunken Twist-cancels and you’re practically good to go. If you don’t have Drunken Twist, I suppose you’ll have to fight him the ‘fair’ way, which can be really annoying. If that’s the case I’d rather use the Chain Yanker + Yes Man Kablaam tactic or simply do a Home Run God if you have enough orbs. If you have no orbs at all, damn, just do whatever; try your best and good luck. >_>”
Pick up the key after he’s defeated, and now you’re ready to unlock the door on the other side to enter the next half of this area.
.jpg)
.jpg)
.jpg)
An elite with a gold club stands waiting in the distance. If your TP isn’t full already, use him to refill it. Just remember to counter in between his swings and he should go down easy. Then, pick up the gold club and jump up the ladder to face 2 whip-ladies. Launch them off the edge (again, press /\), break the objects and jump down the other end.
The last enemy here is an elite skinny ass, characterized by his Mohawk and dual blades. Run up to him and quickly whack/launch him a few times before you throw it at him (or just immediately throw it), then deal with him the usual way or unleash godhand if needed.
Stage 6-3
.jpg)
.jpg)
.jpg)
There’s a Chinese thug busy dancing to your immediate right but don’t fight him yet. Get away from him and wait by the crates to the left for a regular thug with a torch (he’ll appear soon enough around the corner). Take him out around that area and another thug with a torch will join you. All this time, refill as much TP as possible.
When the 2 thugs are gone, it’s time to deal with the dancing Chinese thugs, both of them standing by a fireplace of some sort. You can simply use the torches the regular thugs dropped. At this time, another regular thug may jump down from upstairs, but if not, jump up the ladder and take out the elite Chinese thug to the left. Check your radar often to see if any other regular thug approaches from behind.
.jpg)
.jpg)
.jpg)
.jpg)
In any case, once all enemies are cleared, pick up a torch and light up all 3 fireplace thingies. The door upstairs will now open to reveal 5 enemies (1 Mohawk lady, 1 elite skinny ass, 2 regular thugs, 1 zebra-striped lady). They are entirely optional, so if you think they’re too much to handle, you can simply run past them and enter the door at the end to enter the next area.
If you wish to deal with them, unleash godhand (considering you haven’t used it already). If you have 2 orbs, use La Bomba 2 (it’ll not be enough to kill the elites though). If you have no godhand nor orbs, I friendlily suggest you skip these enemies. If you need health, remember that 2 of the crates in this area will drop a banana and strawberry/banana.
Anyway, before you leave this area through the door upstairs, remember to look to the right of the door for stage 6’s Little Devil.

.jpg)
.jpg)
In this challenge you’ll deal with 3 waves of individual enemies under a 2:30 minute time limit – 1 Sensei, 1 Mohawk lady, 1 Sensei. The Senseis may be annoying if you aren’t used to them yet, but like your first Sensei encounter, keep countering and ducking (or the occasional back flip) carefully and he should eventually go down.
Quickly pick up his katana and throw it at the Mohawk lady (2nd wave) before she gets you first, then deal with her the usual way (fill up TP!). Try not to unleash godhand unless necessary. If you can’t pick up the katana in time, leave it, or pick it up only when the lady’s dizzy. Against the 3rd wave (another Sensei), unleash godhand and that should be it.
Stage 6-4
.jpg)
.jpg)
The first half of the area is enemy-less except for a beat-the-door. Spam Yes Man Kablaam (as always) on it to fully refill your TP, then open it to get to the other side. On the other side, carefully jump from platform to platform until you get to the bigger one with a kennel. Throw the doggie bones to the ledge on the other side to lead the poison Chihuahua to the right where a fatty is sleeping. Once the Chihuahua gets there, the bridge will be lowered.
.jpg)
.jpg)
.jpg)
.jpg)
.jpg)
Cross the bridge and you’ll see 4 fatties of various types (3 in the front, 1 in the back) standing (and sleeping) near an explosive can. Pick up the explosive can quickly and run away before you turn around and throw it at them, preferably the middle one. Feel free to use any roulette or godhand on them if necessary.
Once they’re down, approach the last fatty (a wrestler fatty). This one’s the king of fatties but you can basically deal with him as with a regular fatty. Just beware of his grab attacks; they hurt. He has a lot of HP so you may want to unleash godhand on him but make sure to refill as much as possible. When you’re done, break the crates nearby for a strawberry/banana, but before you enter the door to the next area, run back outside and look to your right; you’ll see a single barrel at the far end. Break it for a rare red card (refills 3 orbs).
Boss Fight - Mad Midget Five


Aaaaaand the douche bags are back. They’re not very different from before though they have a few new attacks. One, they now have a light saber attack that is likely to dizzy you (back flip/run away to avoid). Two, they have a new collaboration attack where all 5 midgets will stand atop one another and spin around to form a whirlwind (also back flip/run away to avoid). The collaboration attack is really easy to avoid, and at the end of it the center one (most likely the red one) will get dizzy, which means you can do a Stake Driver (reaction attack) on him.
Considering you have 3 orbs ready from the previous area (you should), I suggest you aim at the center midget and use La Bomba, which will take out half their health or more. Alternatively, you can try your luck and hit as many of them as possible with Home Run God during another one of their formations where all five of them run towards you in a straight line for consecutive body slams. Note this may be ddificult to accomplish.
One of the crates in this area drops a green card, which means you can do La Bomba 2 a second time, which should be enough to (almost) kill them all =P Otherwise, you can always spam the same old Roundhouse Kick-cancels or launch them non-stop with face kicks/tackles or launch techniques.
Stage 6-6
.jpg)
.jpg)
.jpg)
The first wave of enemies you deal with is 1 lady and regular thug. There’s another thug by the door at the end but he shouldn’t approach you until you defeat the first 2 or if you get too close. After these 3, the door will open and 2 ladies will appear. Whatever you do, don’t break the crates you see nearby and save your godhand for later. After the ladies is another pair of regular thugs, one of them with a wooden plank. Spam face kicks (for non-LV Die) or Drunken Twist-cancels to easily take them out.
.jpg)
.jpg)
.jpg)
.jpg)
Now that you’re done, finally break the crates and pick up the sledgehammer. =) With a weapon and full TP, you’re ready to hop onto the next part of this area. Jump off the ledge at the end and you’ll land in the er… slaves’ working room (I guess). Before you move an inch, quickly look to your right and you’ll see 2 objects. Keep in mind that one of them drops a strawberry/banana so that you know where to go when you need health.
Then, quickly run forward and the first wave of enemies here will appear – 2 regular thugs + 1 lady. Since they’re non-elites, you should take care of them just fine with the sledgehammer; for maximum damage, you can use its launch attack 3~4 times before throwing, but if you’re afraid of dropping the weapon, I say throw it right away.
Soon enough 3 more enemies will join – 1 elite skinny ass, 1 Mohawk lady and 1 regular thug with a gold club. Unleash your godhand and take out the regular thug first, followed by the elite skinny ass. If you can unleash a second time, feel free to do so. If not, quickly and carefully pick up the gold club and kill the skinny ass with it.
At this point, 1 whip-lady is likely to join the fight. Try taking her out ASAP; use a roulette if necessary (I recommend Typhoon Kick or La Bomba 2). If you don’t have any orbs, it’s time to resort to cheapness – spam Drunken Twist-cancels. Just keep in mind that so long your enemy is human sized, Drunken Twist-cancels will 90% guarantee your survival. The remaining 10% is the risk you take just in case the ladies do their grab or jump attacks.
Aim for the whip-lady first and when she’s down, fight the Mohawk lady the usual way (counter/guard break/Yes Man Kablaam) to refill TP. When all enemies are cleared, 3 villagers will jump down and reward you with money, a fruit and Forearm Smash 2 (technique).
.jpg)
.jpg)
.jpg)
This is what I call the rolling boulder tunnel. Quickly take out the first whip-lady (??) you see and be careful not to move out of that little space to avoid the rolling boulders. When she’s done, proceed to the next enemy (elite thug) to the left. He may be annoying to deal with in a tight little space but you can try getting him out of that space for the boulder to hit him.
After him, look to the right up the slope to see a lady (with whip???) waiting; she’s optional. If you just want to proceed to the next stage you can quickly run past her (there’s a regular thug there as well, you just can’t see him from your current angle). Just be careful not to get hit by the boulder. At the end are 2 barrels that’ll give you an orange and banana.
Boss Fight - Psychic Midget


This midget really only has 2 attacks. One, he throws boulders at you consecutively (keep running to avoid). Two, he does this lightning attack from the little platform he stands on; the bolt is vertical so the midget has to float over your head to get you (back flip, side dodge or run to avoid). So as you can see, the little guy himself isn’t much of a threat. It gets annoying only when he won’t stop running away from you and calls upon 2 thugs (non-elite/elite) each time he gets off his platform
So here’s my personal strategy:
The moment battle begins, look at Gene’s 2 o’clock direction and break the barrel you see by the wall. Pick up a wooden post, and then keep running around the perimeter of the battlefield until the midget is ready to get off the platform. Then, quickly run towards him, face kick and launch him 3 times (press /\) with the wooden post before throwing it at him.
By now he’s likely to call upon his underlings regardless if you interrupt his whistle. Roundhouse Kick-cancel him as much as you can (or face kick him away before doing it) until he goes back on his platform. If that proves difficult thanks to the elite thugs, take them out first with one unleash; it should be enough to kill one and leave the other considerably damaged. Then, refill TP using that remaining one. Just don’t forget to evade from the midget’s own attacks.
When the second thug is down and you still have some time before the midget gets off his platform, run to the end of the field (by the lift) and break the first barrel to the left to pick up a steel pipe. When the midget is vulnerable (off-platform) again, launch him 3 times with the steel pipe before throwing it, then repeat the same old strategy written above for the rest of the battle (only, you'll have no more weapons to use).
Feel free to use roulettes if you have any orbs. If you’re facing any difficulty with the (elite) thugs, spam Drunken Fist-cancels. Pwnt. =P
Stage 6-9
.jpg)
.jpg)
.jpg)
In here, 2 Mohawk ladies stand in the distance dancing. To separate them, stick to the wall on the left, pick up the crate and throw it at the one on the left; that’ll provoke just her to come over (the crate also drops a gold card). Run back to where you started and fight her there for safety. When you’re done, taunt the other lady over. Remember to refill TP.
Now that they’re down, pull out one fire stand, break the crate in front to reveal a katana (the other one nearby drops a banana), and proceed forth. A Sensei will now appear but no worries, you’re more than prepared. Immediately throw the fire stand in your hand at him, followed by the katana and the other fire stand. On LV Die, he’ll have just a sliver of health left. If not, he’s dead.
Break all remaining objects nearby and open the green and gold chest out on the protruding ledge to the left for a strawberry/banana and a free technique – Elbow Vortex.
.jpg)
.jpg)
.jpg)
.jpg)
When you’re ready, pick up the katana Sensei dropped and follow the linear path until you get to a giant statue of Elvis. There, you’ll see something similar to a beat-the-door but it isn’t, hence it won’t refill TP even if you do Yes Man Kablaam on it. (Dammit! =P) But wait, don’t do anything here yet. Instead, get up the ladder at the end to see 2 regular thugs. They’ll approach you the moment they see you, so quickly turn 180 degrees around and jump off the ladder to fight them downstairs instead. At this point 3 more enemies are likely to join you – 1 gold club elite + 1 regular thug + 1 lady. Notice that the edge here is open… which means it’s launching time =D
Carefully run past all of them and pick a spot where you can face the enemies and the edge of the ground (see screenshot for example). When they’re close, simply launch them off the edge with the katana. Huzzah!
When you’re done, ‘kill’ that beat-the-wall and pull the switch nearby. Then, climb back up the ladder to the very top to deal with 1 whip-lady. When she’s down, pull the switch nearby to reveal a hidden path to the other side.
Run to the end of the path and you’ll notice an annoying someone waiting for you. As always, it’s up to you to use Drunken Twist-cancels or unleash godhand. Just don’t use any roulette if possible. Defeating him will earn you a free technique – Double Spin Kick. Hopefully by the end of this you’ll have at least 2 roulette orbs and 1 full unleash.
Boss Fight - Shannon


She looks intimidating but don’t worry, she’ll prove a lot easier than Elvis. As the battle begins, unleash godhand and punch as fast as possible to dizzy her at the end. Then, get in 2 Yes Man Kablaams and pummel her. Remember to get in a 3rd YMK as each time Shannon tries to get up and recover from dizziness. Then, unleash godhand again, rinse and repeat.
If/when you don't have enough godhand to follow the strategy above, you'll have to fight Shannon the 'normal way'. Keep punching the beast and side dodge/back flip correctly in time (back flip is safer) to avoid its attacks. In short, repeat this: punch a few times > evade > punch a few times > evade.
Whatever you do, do NOT side dodge when the beast does an attack where it says press O to avoid, so keep your reflexes high. Pressing O in time will cause Gene to roll over towards Shannon’s back/butt where there’s an eyeball of some sort. Keep punching until the beast quickly turns around; side dodge/back flip to avoid.
Repeat this until Shannon (not the beast) attempts to shoot her projectiles. Back flip/duck to avoid (I find back flipping more reliable). The beast is also capable of doing ground projectiles (linear waves); side dodge to avoid.
Lastly, if you need extra health/cards, break the pots laid around the battlefield. Some of them will drop green cards, and one of them will drop a strawberry/banana.