| |
 |
| |
|
| |
|
|
Swordmaster
There are few enemies in mission 8, so to earn
as much stylish points as possible to get an
S rank, it is necessary to use the Swordmaster
style for its increased number of melee attacks.
|
| |
|
| Devil
Arms #1: Agni & Rudra |
Devil
Arms #2: Cerberus |
| Guns #1:
Ebony & Ivory |
Guns #2:
Shotgun |
Leviathan's Inner Core consists
of many areas where it's long and narrow (intestines)
so it is recommended to use Agni & Rudra
whose range of attacks is wide. It will help
a lot in earning stylish points if you can obtain
Level 3 Jet Stream. Practice so that you can
constantly earn S and above ranks for stylish
points with the combination of Agni & Rudra
and Cerberus.
|
| |
|
| Get
S rank point #1 |
|
 |
|
 |
|
|
|
Attempt at
S rank after having cleared mission 8
The time requirement to get an S rank
in mission 8 is not very strict, but if
you don't know your directions well enough
you will end up wasting quite some time.
So, it is better that you attempt for
S rank after you have cleared the mission
once, which by then you would have familiarized
yourself with mission 8's environments.
For your first time through, you may want
to clear secret mission 4 which you can
find in Leviathan's Stomach (top left
pic). Also, do not forget to grab the
blue orb fragment on the deck of the ship
that is also in Leviathan's Stomach.
|
| Get
S rank point #2 |
|
 |
|
 |
|
|
|
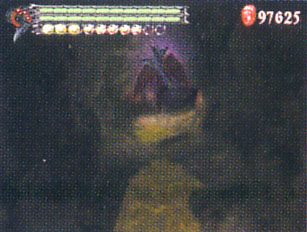
Defeat Gigapede
and gain orbs!
To get an S rank you will need to focus
on getting as many orbs as you can. There
are few battles in this mission and all
the orbs you could have earned in Leviathan's
Retina are absorbed away by the key item
Ignis Fatuus, making it hard to earn enough
orbs. Thus, defeating Gigapede and earning
orbs from it will be one of the only ways
to achieve this. Gigapede's movements
are restricted when it gets to a bend
in the path, so take that chance to attack
him.
|
| Get
S rank point #3 |
|
 |
|
 |
|
|
|
Increase your
ranks wherever you can!
There are few enemies in this mission
so it's important to earn all you can
where it's possible. It may be tougher
to battle the Hell Envies that appear
later in Leviathan's Stomach with acid
all over the ground but that is important
to increase your stylish points and orbs.
In the top right picture, you can see
that the 3 red orbs reappear near the
spot where the last Tusk seal was during
your 2nd arrival at Leviathan's Stomach.
Take them if you need more orbs. |
|
| |
|
| Do
not forget #1 |
|
 |
|
Destroy the Cerberus combat adjudicator!
Before entering the door that has been
unsealed, grab the shotgun that is hanging
on the wall display to the left. Once
taken, you can instantly switch to it
using the L2 button. |
|
| Do
not forget #2 |
|
 |
|
Secret mission #4
Secret mission #4 is hidden behind some
wooden planks in the hull of the ship
at the back of Leviathan's Stomach. Destroy
the planks, then press O near the door
to activate. |
|
 |
Leviathan's
Core
|
| |
|
| Swordmaster |
| Devil
Arms #1: Rebellion |
Devil
Arms #2: Agni & Rudra |
| Guns #1:
Ebony & Ivory |
Guns #2:
Shotgun |
HP: 6500 (core)
/ 2000 (left lung) / 1500 (right lung)
Attribute: --- Boss
bonus: 4500
- Ignore the left lung and attack the right
one. Three reasons why. 1) It has less hit
points. 2) It is weak against fire, putting
Agni & Rudra to great use. 3) You don't
lose your Devil Trigger. (Right lung absorbs
your Devil Trigger and white orbs while
the left lung absorbs all red and green
orbs.
- The right lung has a projected part on
its side and if you get caught in this while
performing Agni & Rudra's Sky Dance,
the limit to performing Air Hike
more than once is reset, making it possible
to perform Sky Dance + Air
Hike again and again. This way, it
is possible for you to not land back on
the ground at all and avoid the Hell Envies.
|
| |
|
| Get
S rank point |
|
 |
|
 |
|
|
|
Finish the
fight stylishly!
If you can use the strategy as stated
in point #2 above, it is not impossible
for you to receive 0 damage. So all
that's left is the stylish points. It
won't be hard to earn the necessary
stylish points if you can gather the
Hell Envies and combo-ing them altogether.
Agni & Rudra should be able to do
it well. Tornado and Tempest can be
of great help against a huge bunch of
enemies. |
|
 |
|
Hard
& Dante Must Die mode
Throughout the battle the core will
shoot two lasers, not one, and the amount
of time is also increased. On the other
hand, the amount of time the core reveals
itself is decreased and the lungs ressurect
faster. The right lung also absorbs
more Devil Trigger. |
|
|
|
|
| Rank
& Quality [Normal mode] |
| |
S |
A |
B |
C |
D |
| Time |
8:30 |
10:00 |
11:30 |
13:00 |
13:01< |
| Orbs |
3000 |
2500 |
2000 |
1500 |
1499> |
| Stylish pts |
4000 |
3000 |
2000 |
1000 |
999> |
| Damage |
5000 |
10000 |
15000 |
20000 |
20001< |
| Item Used |
100 |
400 |
900 |
1500 |
1501< |
| |
|
|
 |
Hard mode
The allocation of enemies is the same
as it is in Normal, the only difference
being their increase in strength. They
may be stronger but by now you should
also have obtained new skills and higher
stats, so clearing this mission shouldn't
be a problem. |
|
|
|
 |
Dante Must Die mode
The allocation of enemies in this mode
is also the same, but the Hell Envies
now turn into Hightime as well, increasing
all their stats and making it a lot harder
to defeat them. Depending on the situation,
use wide ranged attacks and combos wisely
on them. |
|
|
|
 |
Heaven or Hell mode
You can consider mission 8 to be one
of the hardest in this mode. Stepping
even once on any of the acid puddles will
be instant game over, so be very careful.
A good method will be to use Nevan's Air
Raid to glide over the acid puddles in
Leviathan's Intestines. |
|
|
|